Comparison between JS+REST and JSF

This post shares various rationale in choosing between JavaScript+Rest Or JSF (Java Server Faces) for Webapplication development.
The modern web technologies has brought in plethora of java-script frameworks which helps in building responsive UI. JSF is component MVC, which is a part of standard JEE stack, and an end-to-end webframework by itself with access to multiple JEE components.
The JS+Rest and JSF are matured and they are their best with their scopes.

Comparison Criteria: The below is the elaborate criteria for comparing both the frameworks but there can also be more comparison scenarios based on specific business use cases.

Organisational Criteria:These criteria effects more or less organisational capability to handle the current application through out its life time.

  • Popularity and Community support: There are multiple JS libraries/client MVC frameworks like ReactJS,AngualJS which are very popular and have strong community support. JSF implementations like Primefaces also have strong community support.
  • Support: Considering the large community support availability both models have equal support possibilities. On weighing individual options JSF based frameworks have better support when compared to Ajax+rest as there are backed by framework founder companies.
  • Documentation: The documentation for the framework directly affects the developer productivity. Any matured frameworks like AngualarJS, Primefaces, ReactJS are very well documented.
  • License: This directly effects the overall cost of the product throughout its life time. Most of the frameworks are free to use if no commercial support is required.
  • Availability of resources: The skill of available resources directly effects the overall project time-line and cost. This is more subjective to kind of organisation, for a java shop company JSF is better suited, where as for front end companies JavaScript+Rest are better suited.
  • Learning curve: The skill of available resources directly effects the overall project time-line and cost. JSF is general has higher learning curve when compared to javascript, but for a expert component MVC developer JSF has lesser learning curve than pure front end technologies.
  • Productivity: This dependencies on the skill of resources, if a java developer with exposure to component MVC, can use existing tooling and be more productive with JSF. Front end developer will be more productive than JSF developers due to their exposure to stack and lesser tooling required for development and white box tests.
  • Page Complexity: Does page complexity demands huge flashy responsive UI of javascript.

Technical Criteria:These criteria effects QOS(Quality of Service) requirements and few other technical criteria of the application.

  • Sustainability: Sustainability is an ability to remain productive indefinitely with providing value to stakeholders and ensuring safe world for all the stakeholders. One of the key criteria under sustainability is carbon foot print. This is more to do with web page design than a base framework. Considering mobile first apps with lesser content and faster page loads can be more sustainable. Primefaces JSF 2 framework which is powered by jquery can also be as comptent as JS+rest apps in building relatively similar page loads. In general Ajax+rest is expected to have lesser http requests, but badly designed application can have more ajax requests resulting in detrimental of sustainability.
  • Security: Any server side framework like JSF is more secured than pure client side framework. At the same time the badly designed JSF application can be less secure than good designed javascript application.
  • Life-cycle complexity: JSF life cycle is more complex when compared to JS frameworks.
  • Back-end Integration: JSF is only suited if back-end is java applications. For non java technologies java script or their back end native frameworks are undisputed choices.
  • Supported protocols: JSF supports HTTP and Web-Socket(JSF 2.3+) protocol. JavaScript being executed throw browsers so most of the browser supported protocols can be extended for javascript apps.
  • Routing options: JSF is multiple page framework where routing can be declared programatically or xml configurations. Client side JS MVC frameworks like angualarjs also provide routing options for SPA.
  • Data binding: JSF has a better support for databinding when the entire workflow from web view to database is considered. JS frameworks has data binding only to html view and an additional data binding implementation is needed on server side.
  • Project Modularity: We have build pipelines like gulp/grunt available for JS frameworks also which helps in including modularity for JS scripts. But there is always a need of additional modularity model needed for business logic. For JSF applications front-end and back-end being same technology can have standard modular approach.
  • White Box Testing Tools: JavaScript has better whitebox test tools as no specific deployment needed. JSF applications need special embedded containers for white box testing.
  • Server resource usage: JS applications uses lesser server IO and CPU when compared to JSF applications. If primefaces applications are planned with proper client side validations/converters server CPU usage can be drastically reduced.
  • Client resource usage: JS applications uses higher client resources when compared to JSF as more amount of processing is done on client machines.
  • Scalability: JS applications are better scalable as they are of stateless in nature when compared JSF applications which are by default stateful.
  • Mobile: JSF implementations like Primefaces has built mobile UI support which can be leveraged to build mobile first JSF applications. The JS is better suited for mobile apps because of its intrinsic client side centric language.
  • Cloud compatability: JS applications can connect to cloud endpoints. Any JEE applications can be deployed in cloud. JSF 2.X which has path based resource handling and bookmark facility simplifies cloud based resource handling.
  • Post-Redirect-Get: Starting from JSF 2.X, there is cleaner way to implement this pattern on server side. Modern client MVC consider ajax workflows and do not cleanly support this pattern, there can also be technical argument where people claim its not needed for ajax workflows.
  • Browser memory: This mostly depends on the implementation rather than on framework. JS applications has better fine grained control on profiling and minimising the memory usage. JSF developers need to rely mostly on the used framework vendors like Primefaces to resolve the issues.
  • Network usage: Properly designed JS applications uses lesser network when compared to JSF applications where server state need to be maintained.
  • DOM rendering: JS libraries like ReactJS has better performance when compared to pure JSF applications.
  • Client Side validations: JS frameworks by default provides support for client side validations. JSF frameworks like Primefaces support most of the client side validations bringing JSF very near to JS applications.
  • Browser compatibility: JS frameworks as well as JSF implementations support major modern web browsers. The support is only limited to the components provided by the frameworks and any incorrect implementation of basic html elements may result in incorrect display.
  • Auto-Complete: Most of the JS frameworks and JSF implementations provide components for Auto-Complete.
  • Responsive UI: Most of the modern JS frameworks are built for implementing responsive UI. JSF frameworks like primefaces provided specialized css for responsive UI, but developer need to ensure they are used correctly for yielding better results.

Comparison Criteria:

Based on the above criteria the selection of framework mostly depends on the specific business case and organisational culture. On a general note it can be considered that
JSF is better if:

  • Back-end is JEE application.
  • Its application with max users ranging around 10000 users and do not expect to be scalable into 100’s of 1000’s users.
  • A business application where business rules are of more preference than flashy UI.
  • Training is imparted to business users for the application usage.

Ajax+Rest JS applications is better if:

  • Back-end can be non java application.
  • End user is unknown.
  • The application need to scale exponentially.
Demonstrate Executor Service

Overview
We encounter implementations where one main method calls multiple sub-methods (internal/external to current program) in a sequence and wait for the completion of all the methods summing up the total execution time equal to sum of execution times of individual methods. Assuming all the sub-methods are independent and doesn’t need any hierarchy of execution, java concurrency API can used to process all the sub-method calls in parallel there by reducing the execution time nearly equivalent to just longest sub method execution time.

Possible processing options:

  • Processing via for loop.
  • Processing using Executor service.

Technical overview:

  • ExecutorService:
    • ExecutorService is an interface which exposes methods, which is capable of processing the tasks asynchronously. ExecutorService is represents ThreadPool implementation and which is actually an abstraction of ThreadPool.
    • The submit method is used to submit Callable and Runnable tasks for asynchronous process.
    • The shutdown need to be called after processing, in order to reclaim all the resources.
    • Refer ExecutorService javadocs for details.
  • Executors:
  • Callable:
  • Futures:
    • The result of asynchronous computation is represented by Futures.
    • The get method is used to get the result of futures which is synchronous in nature.
    • Java 8 has CompletableFuture which supports asynchronous callback operation.
    • Refer CompletableFuture Javadocs for details.

Source Code Snippets

The code snippet below has below implementations.

  • Creation of Custom Callable.
  • Create a method which mimics external call and wait for 2 secs
  • Call the external call method via conventional java for loop 4 times and check the time taken.
  • Create a thread pool of four threads via ExecutorService and execute external call method in parallel to check the completion time.


package com.siva.mythoughts.executorservice;

public class DemonstrateExecutorService {

public static void main(String[] args) {

DemonstrateExecutorService demonstrateExecutorService = new DemonstrateExecutorService();

long startConcurrProcess = System.currentTimeMillis();

// Creates thread pool with four threads
// You can change the number of tests and re-run the program to notice in difference of execution time
ExecutorService executorService = Executors.newFixedThreadPool(4);
List<Future<Integer>> futures = new ArrayList<Future<Integer>>();

for (int i = 0; i < 4; i++) {
DemonstrateExecutorService.CustomCallable callable = demonstrateExecutorService.new CustomCallable(i);
// ExecutorService submit method accepts instance of Callable/Runnable. Use Callable when needs some output
// ExecutorService submit method returns Future instance
futures.add(executorService.submit(callable));
}

// if its not shutdown, hanging threads may effect shutdown of jvm
executorService.shutdown();
while (executorService.isTerminated()) {
// wait till the process is completed
}
for (Future<Integer> future : futures) {
:::
future.get();
:::
}

// Excecution via standard for loop
for (int i = 0; i < 4; i++) {
demonstrateExecutorService.mimicExternalSystemCall(i);
}
}

private class CustomCallable implements Callable<Integer> {

public Integer call() {
return mimicExternalSystemCall(input);
}
}

private int mimicExternalSystemCall(int i) {
::::
Thread.sleep(2000);
::::
}
}

Maven Enforcer Plugin

Overview
Maven is build automation tool primarily used for java projects. Maven helps in build, documentation, dependency management, distribution etc., Maven has multiple plug-ins out of which enforcer plug-in is one where certain rules can be enforced which can cause the build to fail if those rules are not met. The enforcer plug-in helps in having standardized and reproducible build across different project environments. This plugin is termed as “Maven Enforcer Plugin – The Loving Iron Fist of Maven”

My Use cases:
We are working on restructuring on our project setup to make it more standardized and reproducible. During this process we have two typical issues:

  • We want to restrict some dependencies on few of the modules
  • We also want to ensure that multiple versions of same jars or not imported, basically we want to ensure dependency convergence

Maven Enforcer Plugin
Maven Enforcer provides rules to enforce banned dependencies and dependency convergence. It also provides additional standard rules from perspective of Maven, Java versions and others, detailed rules can be found here.

Dependecy Convergence
This rule ensures that dependency version numbers converge. If a project has two dependencies A and B which are dependent on C, if the version of C that A is dependent is different than the version B is dependent then this rule will make the build fail.

Banned Dependencies
Some of the projects will have restriction not to depend on internal projects to ensure those are mutually exclusive during run time. There can also be restriction not to depend on snapshot versions and specific releases. These kind of restrictions can be implemented via enforcer plugin rules

Implementing Banned dependencies and Dependency Convergence

The below code snippet provides the following features:

  • All the maven modules which are inherited to parent will have Banned Dependencies and Dependency Convergence rules implemented.
  • The mentioned artifacts under excludes will be banned in the build process, the regex can also be included under excludes.
  • The artifact mentioned under includes tag will be allowed as an exception to excluded artifacts.
  • The current enforce rule execution is executed during validate phase which is the first phase under maven life cycle execution.
  • As per current rule configuration, the build will fail if any of the child projects has banned dependencies or dependency convergence issues. The fail tag can be set to false, so that violations will only be logged as Warnings allowing build to be successful.
  • By default the enforce rule-Banned Dependency will also be implemented for transitive dependencies, which can be disabled by inclusion of searchTransitive as false.
<project>
 <groupId>com.siva.mavensetup.multi</groupId>
  <artifactId>project-root</artifactId>
   <version>1.0</version>
   <packaging>pom</packaging>
  [...]
  <build>
    <plugins>
      <plugin>
        <groupId>org.apache.maven.plugins</groupId>
        <artifactId>maven-enforcer-plugin</artifactId>
        <version>1.4.1</version>
        <executions>
          <execution>
            <id>enforce-my-rules</id>
            <phase>validate</phase>
            <goals>
              <goal>enforce</goal>
            </goals>
            <configuration>
              <rules>
     <!-- Configuration for banned dependencies -->
                <bannedDependencies>
                  <excludes>
                    <exclude>org.apache.maven</exclude>
                    <exclude>*:badArtifact</exclude>
                  </excludes>
                  <includes>
                    <!--only 1.0 of badArtifact is allowed-->
                    <include>org.apache.maven:badArtifact:1.0</include>
                  </includes>
                </bannedDependencies>
       <!-- Configuration for dependency convergence -->
                <dependencyConvergence/>
              </rules>
              <fail>true</fail>
            </configuration>
          </execution>
        </executions>
      </plugin>
    </plugins>
  </build>
  [...]
</project>

Disable Maven Enforcer Rules On Specific Child Projects
The enforcer rules implemented on parent will be applied on the child projects. In case of scenario where specific child project need to be exempted from enforcer rules, enforcer-plugin need to be overridden mapping to none of the life cycle phases. Find below the code snippet

<project>
[...]
<parent>
  <groupId>com.siva.mavensetup.multi</groupId>
  <artifactId>project-root</artifactId>
  <version>1.0</version>
</parent>
 
<build>
   <plugins>
     <!-- -->
      <plugin>
        <artifactId>maven-enforcer-plugin</artifactId>
        <executions>
          <execution>
            <id>enforce-my-rules</id>
            <phase>none</phase>
          </execution>
        </executions>
      </plugin>
   </plugins>
</build>
 [...]
</project>


Unique identification of entities in Collections

Overview
Every java class need to have equals() and hashcode() methods implemented which are used for distinctly identify the object. The equals() method is used by methods like contains(Object o), remove(Object o) and put() to uniquely identify the objects.

Business use cases:

  • When a specific business key need to be used for any of the methods specified above, equals() and hashcode() need to be overwritten.
  • A person entity need to be identified uniquely based on combination of name and dob, which combination need to be verified before adding to the list.
  • A map of persons need to be maintained where the key represent the Person entity which can be uniquely identified based on combination of name and dob.

Source Code snippets:

  • Implementation of hashcode() and equals():
    • The below source code snippet provides implementation of equals and hashcode.
    • The equals method checks the combination of name and dob as unique key.
    • As per java contract every object with distinct equals result need to have distinct hashcode which makes it mandatory to override hashcode also every time equals is overwritten.
	private class Person {

		private String name;
		private Date dob;
		private String address;
		private String skillset;

		public Person(String name, Date dob) {
			this.name = name;
			this.dob = dob;
		}
:::::::::::::::::::::::::::::::::::
		@Override
		public int hashCode() {
			int dateInt = (int) (dob.getTime() / 1000);
			int nameHash = name.hashCode() + dateInt + 31;
			return nameHash;
		}

		@Override
		public boolean equals(Object obj) {
			if (obj == null) return false;
			if (!(obj instanceof Person)) return false;
			if (obj == this) return true; 
			Person person = (Person) obj;
			if (person.name.equalsIgnoreCase(name) && person.dob.equals(dob)) {
				return true;
			} else {
				return false;
			}
		}
	}


  • Testing contains method on List:
    • Create person1 and person2 entities with same name(Tom) and dob(1980-01-01).
    • Check whether entity exist in list using contains method.
    • The first sysout results in personlist size as 1, as contains method returns false as person2 entity business key matches to that of person1 entity.
    • Modifying the person2 dob will allow it to be added to the arraylist
    • Comment the equals and hashcode method in Person class and re-try the examples to notice how contains method works.
:::::::::::::::::::::::::::::::::::::::::::::::::::::::::::::::::
		List<Person> personsList = new ArrayList<DemoHasCodeEqualsImpl.Person>();
:::::::::::::::::::::::::::::::::::::::::::::::::::::::
	Person person1 = codeEqualsImpl.createPerson("Tom", dateFormat.parse("1980-01-01"), "US", "Run");
	personsList.add(person1);
	Person person2 = codeEqualsImpl.createPerson("Tom", dateFormat.parse("1980-01-01"), "Germany", "Rob");
	if (!personsList.contains(person2)) {
		personsList.add(person2);	
	}
	System.out.println("Person list when name and dob are same for person2 "+personsList.size());
	person2 = codeEqualsImpl.createPerson("Tom", dateFormat.parse("1980-02-01"), "Germany", "Rob");
	if (!personsList.contains(person2)) {
			personsList.add(person2);	
	}
	System.out.println("Person list when name and dob are different for person2 "+personsList.size());

  • Testing unique key in Map:
    • Create person1 and person2 entities with same name and dob
    • Add both the persons to map and check the size of the map
    • Its noticed there is only entry in the map and its also noticed person2 data overwrites the data of person1
    • Now modify person2 dob and re-try it, to notice both the entities are added to the map
    • Comment the equals and hashcode method in Person class and re-try the examples to notice how put method works.
	Person person1 = codeEqualsImpl.createPerson("Tom", dateFormat.parse("1980-01-01"), "US", "Run");
	personMap.put(person1, person1);
	Person person2 = codeEqualsImpl.createPerson("Tom", dateFormat.parse("1980-01-01"), "Germany", "Rob");
	personMap.put(person2, person2);
	System.out.println("PersonMap expects to have only one entity:--> "+personMap.size());
	person2 = codeEqualsImpl.createPerson("Tom", dateFormat.parse("1980-02-01"), "Germany", "Rob");
	personMap.put(person2, person2);
	System.out.println("PersonMap expects to have two entities:--> "+personMap.size());

Protect Java sources from Reverse Engineering

Overview

If we are developing java application whose byte code is publicly distributed over internet, there is always possibility to reverse engineer the class files using various decompilation tools.
To make reverse engineering much difficult, Java obfuscators can be used.
Java obfuscators will ensure to replace the identifiers to names which are unclear and also make the flow very difficult to understand after decompilation.
There are multiple free and commercial Java obfuscators whose list can be found here.
The current post deals with obfuscation process using Proguard.

Pre-requisites

  • Jdk installed, can be downloaded here
  • Java decompiler, the current post uses JAD, can be downloaded here. JAD is currently outdated and doesn’t support latest jdk enhancements
  • Java obfuscator, the current post uses Proguard, can be downloaded here.

Sample source file

The below is sample java source files (NoObsfuscation.java and ObfuscationImpl.jav) which will be explained in current post, other sample files can be found here.

	public class NoObsfuscation {

	public static void main(String[] args) {
		ObfuscationInterface obfuscationInterface = new ObfuscationImpl();
		obfuscationInterface.printInput("obfuscation interface instance");
		obfuscationInterface.printDefaultMthd();
		
		ObfuscationImpl obfuscationImpl = new ObfuscationImpl();
		obfuscationImpl.genericAbstractMethod();
		obfuscationImpl.genericImpl();
	}
}
public class ObfuscationImpl extends AbstractObfuscation implements
		ObfuscationInterface {

		public void printInput(String input) {
		System.out.println("printInput implementation:--->"+this.hashCode());
	}

	@Override
	public void genericAbstractMethod() {
		System.out.println("genericAbstractMethod:-->"+this.hashCode());
	}

Obfuscation Steps with Proguard

  • 1. Create Proguard Conf flile

  • The proguard conf file provides configuaruon details to be considered while obfuscation. The below mentioned are few config details and complete list can be found here.

          # The input jar which need to be obfuscated.
            -injars  core-java.jar
    
          # The obfuscated jar. 
            -outjars core_java_obfuscated.jar
    
          # The java source library jar which is the run time jar for code execution.
            -libraryjars "C:/Program Files/Java/jdk1.8.0_25/jre/lib/rt.jar"
    
          # Proguard provides map file which provides mapping between original java source identifiers and obsfuscted names for trouble shooting  and debugging purpose.
            -printmapping proguard.map
    
          # Proguard removes the unused and unreferenced sources to reduce the size of obfusctaed file. dontshrink options instructs proguard to retain all the files without removing them.
            -dontshrink
    
         # This file is not obfuscated and considered as root of the current references
           -keep public class com.siva.mythoughts.obfustcation.NoObsfuscation { *; }
    
         # This ensures all the files with below mentioned package are not obfusctaed and remain in tact
           -keep class com.siva.mythoughts.executorservice.* { *; }


  • 2. Execute Proguard

  • The proguard can be executed via command line Or it can also be executed during build process using Maven.
    The successful execution of proguard results in out jar as well as map file

            Execute via Command line
            C:\obfuscation\proguard5.2.1\proguard5.2.1\bin>proguard.bat @../examples/myconfig.pro
         
    	<profiles>
     	  <profile>
    	    <id>obfuscatedemo</id>
      	    <build>
      	     <plugins>
      		<plugin>
      		   <groupId>com.github.wvengen</groupId>
      		   <artifactId>proguard-maven-plugin</artifactId>
      		   <version>2.0.11</version>
      		   <executions>
      		     <execution>
      			<phase>package</phase>
      			<goals><goal>proguard</goal></goals>
      		     </execution>
      		    </executions>
      		   <configuration>
      			<outjar>core_java_obfuscated.jar</outjar>
      			<options>
      		 	   <option>-dontshrink</option>
      			   <option>-dontwarn</option>
      			   <option>-keep public class com.siva.mythoughts.obfustcation.NoObsfuscation { *; }</option>
      			   <option>-keep class com.siva.mythoughts.executorservice.* { *; }</option>
      			</options>
      		    </configuration>
      		</plugin>
      	     </plugins>
      	   </build>  		
    	</profile>
         </profiles>
         

  • 3. Decompiled sources

  • Find below the comparison between decompiled sources after and before obfuscation.

           import java.io.PrintStream;
           // Referenced classes of package com.siva.mythoughts.obfustcation:
           //            b, c
           public class NoObsfuscation
           {
    public NoObsfuscation()
        {
        }
    
        public static void main(String args[])
        {
            (args = new b()).c();
            args.a_();
            args = args = new b();
            System.out.println((new StringBuilder("genericAbstractMethod:-->")).append(args.hashCode()).toString());
            System.out.println("Generic Abstract Implementation");
        }
    }
    
    package com.siva.mythoughts.obfustcation;
    
    // Referenced classes of package com.siva.mythoughts.obfustcation:
    //            ObfuscationImpl, ObfuscationInterface
    
    public class NoObsfuscation
    {
    
        public NoObsfuscation()
        {
        }
    
        public static void main(String args[])
        {
            ObfuscationInterface obfuscationInterface = new ObfuscationImpl();
            obfuscationInterface.printInput("obfuscation interface instance");
            obfuscationInterface.printDefaultMthd();
            ObfuscationImpl obfuscationImpl = new ObfuscationImpl();
            obfuscationImpl.genericAbstractMethod();
            obfuscationImpl.genericImpl();
        }
    }
    
  • 4. Proguard Map file

  • The below is the proguard map file which can be used for debugging and troubleshooting purpose.

        com.siva.mythoughts.obfustcation.AbstractObfuscation -> com.siva.mythoughts.obfustcation.a:
        void <init>() -> <init>
        void genericImpl() -> a
        void genericAbstractMethod() -> b
    
        com.siva.mythoughts.obfustcation.NoObsfuscation -> com.siva.mythoughts.obfustcation.NoObsfuscation:
        void <init>() -> <init>
        void main(java.lang.String[]) -> main
    
        com.siva.mythoughts.obfustcation.ObfuscationImpl -> com.siva.mythoughts.obfustcation.b:
        void <init>() -> <init>
        void printInput$552c4e01() -> c
        void genericAbstractMethod() -> b
    
        com.siva.mythoughts.obfustcation.ObfuscationInterface -> com.siva.mythoughts.obfustcation.c:
        void printInput$552c4e01() -> c
        void printDefaultMthd() -> a_
    		

Limitations of Obfusction

  • Obfuscation process doesnt change the name of java API classes, they are still visible in decompiled obfuscated code
  • Dynamic generated classes obfuscation may create instability in the program execution
  • Obfuscation of life cycle call back methods may create instability during call backs
  • Serialized classes are not obfuscated
  • Further enhanced releases of the software should ensure to maintain compatibility with previous released obfuscated code
  • Some of the obfuscators may change the code work flow which may prevent jvm optimizations
  • Some anit virus softwares may alert obfuscated code as malicious

Jinfo Java Command Line Utility

Overview

jinfo is command line utility which gets the configuration information of running jvm process. It can also be used to set some of the jvm configuration parameters at runtime.

Usage Commands:

  • Jinfo help:

    JAVA_HOME/bin/jinfo –h
  • Display all the non default vm parameters and system parameters for specified process id (pid):

    JAVA_HOME/bin/jinfo pid
  • Display VM parameters details:

    JAVA_HOME/bin/java -XX:+PrintFlagsFinal

Display Configuration Info using jinfo:

  • Display VM flags used by specified jvm process:

    JAVA_HOME/bin/jninfo  -flags pid
  • Display all the system properties used by specified jvm process:

    JAVA_HOME/bin/jninfo  -sysprops pid

help_vm_sysprops

Retrieve and Modify Configuration Info using jinfo:

  • Display current value of specified vm parameter:

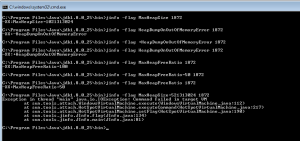
    JAVA_HOME/bin/jninfo  -flag MaxHeapSize 1872
  • Set boolean value vm parameter. Plus sets the value whereas minus removes it:

    JAVA_HOME/bin/jninfo  -flag +HeapDumpOnOutOfMemoryError 1872
  • Set specified value to non-boolean vm parameter:

    JAVA_HOME/bin/jninfo  -flag MaxHeapFreeRatio=50 1872
  • Manageable parameters exposed via DiagnosticMbean can only be set at runtime using jinfo

  • If a parameter could not be set by any of the above commands we get error message “Command failed in targe VM”

modifyParams

Conclusion:

jinfo is experimental feature offered in java which is prone to changes in future versions. The changes done via jinfo can also be modified via jconsole

Run Gulp.js from eclipse

Overview

This post provides details on how run gulp.js in eclipse.

Pre-requisites:

  • Install node on Local machine.
  • Install node eclipse plugin as described here.
  • Download required node modules to get the required libraries as described here.

Steps to execute Gulp.js:

  • Create gulp.js file with required tasks.
  • Create build.js file with trigger to gulp.js file.
  • Right click on build.js file and run it as Node Application.
  • In order to trigger specific gulp tasks, trigger them via program arguments to build.js.
Find below the snippet of the gulp.js, you can find complete gulp.js here.
var gulp = require('gulp');

:::::::::::::::::::::::::::::::::::
:::::::::::::::::::::::::::::::::::

gulp.task('default', ['build']);

gulp.task('clean', function () {
:::::::::::::::::::::::::::::::::::
:::::::::::::::::::::::::::::::::::
});
   
Find below the snippet of the build.js, you can find complete build.js here.
var gulp = require('gulp');
require('./gulp.js');

if(process.argv[2] == 'clean'){
	gulp.start('clean');
} else if (process.argv[2] == 'output') {
	gulp.start('output');
}else if (process.argv[2] == 'minifiedoutput') {
	gulp.start('minoutput');
} else {
	gulp.start('build');
}
   

Also Read:

Gulp Basic example

What is Gulp

Gulp is simple form is a javascript task runner. For java background developers this is very similar to Ant which helps in build and deployment process more standardised, repeatable and automatic. Gulp is a streaming build system which is built in Node.js. This stream build approach provides flexibility of piping data transformations. Gulp is powered by more than 2000 plugins which helps us web development process simpler and faster.Lets have simple workflow of creating output file involving compilation of jsx scripts, browsification and creating minified output js file.

Gulp Installation:

Gulp can be installed over npm.
Find below the installation of all the required modules for current post.
	npm install --save gulp
	npm install --save gulp-clean gulp-uglify
	npm install --save vinyl-source-stream browserify gulp-streamify gulp-babel
    npm install --save babel-preset-react babel-preset-es2015 babel-plugin-transform-object-rest-spread

Current Project setup:

In the current project, we does the following tasks using Gulp.

  • Compilation of JSX scripts to js format using Babel
  • Combination of various js files into minified output file
myFixedDataTable

Gulp Usage:

The gulp API consists of gulp.src, gulp.dest, gulp.task and gulp.watch

  • gulp tasks: This includes the tasks that need to be executed which can take up to to three parameters. The name of the task, dependent tasks and function to be executed for that task. All the tasks are executed in parallel unless they are configured as dependent tasks.
  • gulp src: This takes the array of input js files which returns a stream which can be piped to plugins.
  • gulp dest: This will create files and can also be piped.
  • gulp watch: This watches the files that are modified and trigger the tasks that need to be executed.

Gulp Plugins:

Gulp has multiple plugins which can be installed via npm. Find below overview of gulp-plugins used for this post.
The complete details of gulp plugins can be found here.

  • gulp-clean: This plugins deletes the configured directory.
  • gulp-uglify: This includes the js minification process on input files.
  • vinyl-source-stream: This helps in transformations of the input files to streams and piping the streams.
  • browserify: This converts the js code with require methods to browser compatible form and also create the bundled output.
  • gulp-streamify: This converts stream to buffer.
  • gulp-babel: Compiles the JSX code to browser compatible js format.

Gulp JS file:

Find below the gulp js file.
var gulp = require('gulp');
var clean = require("gulp-clean");
var uglify = require('gulp-uglify');
var source = require('vinyl-source-stream');
var browserify = require('browserify');
var streamify = require('gulp-streamify');
var babel = require('gulp-babel');

var path = {
  HTML: 'src/index.html',
  JSX: ['src/js/*.jsx', 'src/js/**/*.jsx', 'src/js/**/*.js', 'src/js/*.js'],
  MINIFIED_OUT: 'output-min.js',
  OUT: 'output.js',
  DEST: 'dist',
  DEST_BUILD: 'dist/build',
  DEST_BUILD_UNUGLI: 'dist/build',
  COMPILE_DEST_BUILD: 'dist/compiled',
  DEST_SRC: 'dist/src',
  ENTRY_POINT: 'dist/compiled/objectdisplay.js'
};

gulp.task('compile', ['clean'], function () {
	return gulp.src(path.JSX)
		.pipe(babel({
			presets: ['es2015', 'react'],
			plugins: ['transform-object-rest-spread']
		}))
		.pipe(gulp.dest(path.COMPILE_DEST_BUILD));
});

gulp.task('build', ['compile'], function(){
  browserify({
    entries: [path.ENTRY_POINT]
  })
    .bundle()
    .pipe(source(path.MINIFIED_OUT))
    .pipe(streamify(uglify()))
    .pipe(gulp.dest(path.DEST_BUILD));
	console.log('build executed');
});
s
gulp.task('clean', function () {
	return gulp.src(path.DEST)
		.pipe(clean());
});

gulp.task('default', ['build']);

Wrapping Current Post:

The below are the steps that are executed in order as per gulp.js

  • The path is defined with all the input and output directories/files.
  • The default task is build, which has dependent task as compile and it has dependent task as clean.
  • The clean task deletes the output dist directories/files.
  • The compile task compiles react JSX syntax and ecmascript 2015 syntax to browser acceptable js.
  • The browserify process identifies the dependent js files based on input configuration and bundles into output file.
  • The uglification process compresses into minified js file.

Also Read:

Babel – Javascript Transpiler

What is Transpiler?

A source to source compiler is called Transpiler or transcompiler.
A compiler translates code from higher level language to lower level programming language, where as transpiler compiles from one language to other or from version to other.

Why are Transpilers Used?

An overview on transpilers on wiki are found here.

  • They are used to modernize the legacy code to next version programming language.
  • For refractoring purpose.

What is Babel?

Babel is javascript transpiler which can be used to compile javascript source.
Babel details are found here.

What Babel offers?

  • Conversion of EcmaScript 2015 & beyond features to javascript supported by browsers.
  • Supports conversion of JSX syntax to React-js javascript components.
  • It comes with pluggable architecture where only required plugin can be executed.

How Babel can be executed?

Babel can be executed in multiple forms, the complete list can be found here.

  • Builtin tools like babel-cli.
  • Build systems.
  • Frameworks.
  • Language APIs.
  • IDEs.

Required Installations

All the required installations can be done via npm.
Install Babel command line, the detailed usage details for CLI are found here

	  npm install babel-cli
	

Babel presets and plugin installation. The complete supported list is found here

	   npm install babel-preset-es2015
	   npm install babel-preset-react
       npm install babel-plugin-transform-object-rest-spread   
	

Usage of Babel

  • Source JSX file – This current example explains the conversion of below es2015 and react jsx features to compatible scripts
    • Es2015 feature – String creation with literal support.
    • Es2015 feature – String interpolation.
    • Es2015 feature – Spread attributes.
    • Es2015 feature – Object spread attributes.
    • Reactjs JSX format.
  • Sample source file
    var React = require('react');
    
    // String creation with literal support
    var mystr = `In JavaScript '\n' is a line-feed.`
    var mymodstr = `In JavaScript
    is a line-feed.`
    
    // String interpolation
    var name = "Bob", time = "today";
    var consolname = `Hello ${name}, how are you ${time}?`
    
    // spread attributes ... is only supported by es2015 modified to Array
    var func = (x, y, ...z) => { console.log(z); return x + y; };
    
    // Object spread attributes need plugins while compilation
    var dataFunc = ({rowIndex, data, col, ...props}) => (
        console.log(data.getObjectAt(rowIndex)[col].toLocaleString())
    );
    
    // The JSX format is converted to js format by babel 
    ReactDOM.render(
      <h1>Hello, world!</h1>,
      document.getElementById('example')
    );
    	   
  • Script compilation
    	 babel --presets es2015,react --plugins transform-object-rest-spread ReactJsx.jsx -o ReactJsxMod.js
    	 
  • Resultant source file with browser compatable javascript code
    "use strict";
    
    function _objectWithoutProperties(obj, keys) { var target = {}; for (var i in obj) { if (keys.indexOf(i) >= 0) continue; if (!Object.prototype.hasOwnProperty.call(obj, i)) continue; target[i] = obj[i]; } return target; }
    
    var React = require('react');
    
    // String creation with literal support
    var mystr = "In JavaScript '\n' is a line-feed.";
    var mymodstr = "In JavaScript\nis a line-feed.";
    
    // String interpolation
    var name = "Bob",
        time = "today";
    var consolname = "Hello " + name + ", how are you " + time + "?";
    
    // spread attributes ... is only supported by es2015 modified to Array
    var func = function func(x, y) {
      for (var _len = arguments.length, z = Array(_len > 2 ? _len - 2 : 0), _key = 2; _key < _len; _key++) {
        z[_key - 2] = arguments[_key];
      }
    
      console.log(z);return x + y;
    };
    
    // Object spread attributes need plugins while compilation
    var dataFunc = function dataFunc(_ref) {
      var rowIndex = _ref.rowIndex;
      var data = _ref.data;
      var col = _ref.col;
    
      var props = _objectWithoutProperties(_ref, ["rowIndex", "data", "col"]);
    
      return console.log(data.getObjectAt(rowIndex)[col].toLocaleString());
    };
    
    // The JSX format is converted to js format by babel
    ReactDOM.render(React.createElement(
      "h1",
      null,
      "Hello, world!"
    ), document.getElementById('example'));


Download Node modules in Eclipse work space

Overview

This post provides details on how the node modules can be downloaded into Eclipse workspace.

Pre-requisites:

  • Install node eclipse on Local machine.
  • Install node eclipse plugin as described here.

Node Modules download steps:

  • Create package.json file.
  • List out the modules to be downloaded as dependencies.
  • Right click on package.json and run as npm install.
  • All the required modules will be downloaded to Eclipse workspace.
   {
   "name": "demo-eclipse",
   "version": "0.0.1",
   "private": true,
   "dependencies":{
	   "gulp":"3.9.0",
	   "del":"*",
	   "gulp-babel":"*",
	   "babel-preset-es2015":"*",
	   "babel-preset-react":"*",
	   "babel-plugin-transform-object-rest-spread":"*",
	   "browserify":"*",
	   "gulp-uglify":"*",
	   "vinyl-source-stream":"*",
	   "gulp-streamify":"*",
	   "react":"*",
	   "fixed-data-table":"*",
	   "faker":"*",
	   "react-dom":"*"   
    }
   }   
   
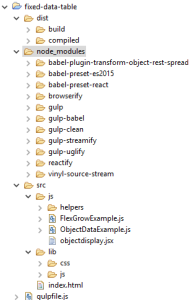
Refer Node Modules screenshot below:
nodeModules


Also Read: